
I completed deburring the right hand aileron and moved back to the left aileron. The first step was to mark the small flange so that I could determine what overlap I would have. I looks like I\’m shy about 1/64th from the 1/4 inch edge distance that I would like to achieve. Next I marked the hinge and drilled most of the the pilot holes. I left out the one at the middle rib and the ones at the counterbalance ribs. I\’ll mark and drill these while transferring the holes from the hinge to the skin. I transferred all of the holes in the hinge to the skin. Next, I marked and added the holes through the each of the ribs.
Ailerons
Re-drilling pilot holes up to #30
Ailerons
Tonight I worked at completing the pilot holes for the hinge in the aileron skin. I pretty much completed all of the pilot holes. I discovered there was one left when I took apart the aileron. My next step will be to enlarger all the holes to #30.
Aileron Hinge
Drilled the pilot holes in one hinge and then started to transfer the holes to the small flange on the skin.
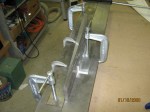
Aileron Assembly
Tonight I removed the clecos so that I could check the overlap of the skin before drilling the hinge. I have found in the past that one of the control surface skins did not have the correct overlap and I did not end up with the correct edge distance. This one seems pretty close. I think I will move the holes about 1/64th closer to the edge of the hinge to provide the best edge distance for both the hinge and the skin.
Aileron Assembly
I continue to work on the aileron assembly, drilling pilot holes and laying out the holes on the skin. I completed all of the pilot holes in the left aileron skin and clecoed it together. Next I cleaned up and move on to the right aileron skin. I finished all the pilot holes in this skin as well. I should say all the pilot holes except for the hinge on both ailerons. That\’ll be for another day.
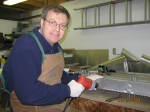
Aileron Tip Rib
Aileron Rib 1 – Trace and cut out blank 2 – Drill hole for radius before notching 3 – Trim notch and then file edges to side. 4 – Form angles Aileron Skin 1 – Trim longest cut edge to exact size. 2 – Clean up front edge (shortest edge) 3 – File angle at trailing edge to match tip rib. 4 – Trim the lower edge of the aileron skin to meet the front and back. Clean up the edges and check the fit of the tip rib. After completing the tip rib and aileron skin I started to layout the rivet holes. I started do drill the holes for the counterbalance ribs but I discovered that I need a long drill bit.
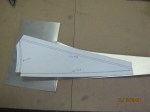
Aileron Tip Rib
Tonight I cut out and formed a new aileron tip rib based on the new drawing I created using my 3D model of the aileron skin. Wow, it fits great. I still need to do a bit of work on trimming the skin but the rib seems to fit great.

Aileron Tip Rib
Tonight I spent a bunch of time at the CAD system to create a 3D model of the aileron tip so that I could create my own pattern for the tip rib. I created a new sheet metal model of the rib and then created the flat pattern. Tomorrow I\’ll try fabicating it and see what happens. Screen shots and a drawing to follow if it works. Stay tuned.
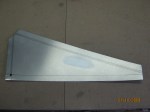
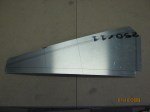
Aileron Skins
Started to cut out the Aileron Skin


You must be logged in to post a comment.