
I filed the landing light opening to smooth the edges left from drilling the small holes. Next, I sanded the edges and used a bit of scotch brite to clean things up. I also used my soldering iron to trim the protective coating on the outside of the wing skin. Since I needed to open up the wing tip I needed to complete the holes in the inboard filler strip. I up drilled the pilot holes to #20.
Landing Lights
Tonight I worked on cutting out the landing light hole in the right wing. I started by drilling a series of #40 holes. Next I used the tips of my snips to cut between the holes and removed the centre leaving the cutout for the landing light.
Transferring holes through bottom skin to rear spar
I finished transferring the #40 holes from the lower rear skin through to the rear spar. I also setup the wing to be flipped over in preparation for work on the landing light cutout
Making Wing Tip Mounting Angles
Making Nut Plate Spacers
Today I finished drilling all of the nut plate spacers for the nut plates with the centered threaded hole. After completing the nut plates I riveted them to the first angle for the bottom rear of the wing tip. I have one more nut plate to attach to this angle. It is a nut plate with the threaded hole at one end. I need to make up special spacers for this style nut plate.
Making Nut Plate Spacers
Today I continued to make the nut plate spacers. I made up one more strip of 5/16 inch wide by 1/16 inch thick strip and marked up the holes at 1 inch centers.
Counter Sunk Spacers
I worked at making the spacers for mounting the nut plates to the counter sunk holes in the wing tip angles.
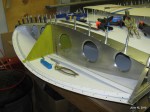
Right Wing Tip
I up drilled all of the holes on the bottom of the wing for the wing tip angles to #30. I also removed the protective plastic coating. Next I up drilled the holes in the top of the wing for the wing tip angles to #30 and removed the protective plastic coating. I then started to dimple the holes for the countersunk screws. I completed the all of the wing skins and the two bottom angles. The top angles will need to be done with a special C-clamp I made up when making the wing tip for the other wing.

You must be logged in to post a comment.