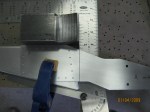
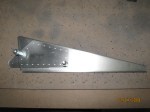
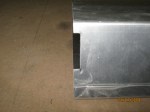
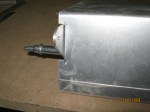
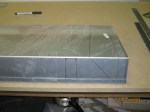
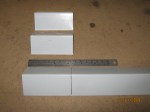
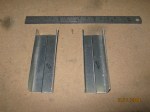
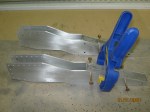
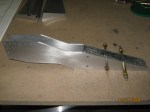
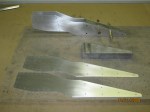
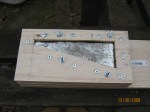
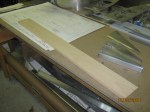
I completed all of the pilot holes (#40) in the counterbalance assemblies and moved on to the drive rib assemblies. I also drilled all of the pilot holes in these assemblies. Next, went back to work on the aileron skin and cut out the notch for the drive rib assembly. After cutting out the notch I went back to work on the counter balance assemblies. I enlarged all of the holes to #30 then I proceeded to install the small channels that I made earlier. I would like to put the rivets in the channels from the outside but I don\’t know if there will be enough room. I may try a rivet or two to see if there is enough room for the rivets. A test of the rivets didn\’t work. I guess it\’s best just to follow the plans. I disassembled one of the counterbalance assemblies and deburred one half. Next, I riveted the half together. Tonight, I finished riveting the counter balance assemblies and the drive ribs.
More Aileron Construction
I completed finishing and forming the last two aileron ribs. Next I started to layout the aileron skins. I have to make sure to measure twice and cut once. One of the tough dimensions is the 2-19/32. I decided that that dimension should be at the start of the radius on the end of the aileron. I then sighted across the aileron to complete the curve around the edge radius.
Channel and Counterbalance Assembly
Today I complete the trimming of the channels. I drilled the rivet holes in both angles to make up the channel assembly then I started on the counterbalance assemblies. I measured and drilled the first pilot holes in the aileron ribs for the counterbalance plates. Next I realized that I did not have enough ribs and have proceeded to cut out two more.
Channel Assembly
I need to make two channel assemblies, one for each counter balance assembly. I started by finding my Z02-03 angle stock. Next I cut the 4 pieces to length and started to trim them to width.
Aileron Counterbalance Assembly
I continued drilling the #30 holes through the lead weights today. Next I enlarged the holes to 3/16.
Counterbalance Assembly
Today I started to drill the holes through the lead weights. I started with a #30 bit so that I could keep the holes lined up with the aluminum counterbalance plates. After; the #30 I moved up to the finished size of 3/16 inches. I used a pecking action and some candle wax as a lubricant and had no problems.
Second Counter Weight Assembly
I started by using the aluminum counter balance plates to drill #40 pilots for the the through holes in the counter weights. After marking all the holes I continued using a #30 drill in the drill press.
Making Aileron Counter Weights
I purchased an inexpensive pot and proceeded to melt my lead divers weights on a camp stove. It seemed to take quite a while for the melting to begin but once it started it proceeded fairly quickly. Once I had about 1/2 of one 8 lb weight melted I decided to try pouring. Pouring the lead into the mold was pretty uneventful. There seemed to be a lot of bubbling going on. I\’ll have to see what the results look like after I get the lead out of the mold. The first weight looked great out of the mold. The second one was not quite so nice. I used my plumbing torch to melt some additional lead and fill in the voids.
Making Molds for Aileron Counterweights
I used some hardwood to create the mold for the counterweights. The wood was only 3/4 of an inch thick so I doubled up the thickness. I screwed the two blocks together then I cut out the form using a jig saw. Next I used a third piece for the bottom of the mold. I drilled through all three pieces and bolted them together. I figured it would be easy to remove the bottom after the lead hardens and I would be able to tap the weight out.
Fabricating Aileron Ribs
I started the work today by cleaning up the rib blanks I cut out earlier. I used my bench sander as well as a sanding block and files to get all of the rib blanks to the same size. (Or as close as I could get) After making all of the blanks the same size I set up my bending brake and formed all of the flanges. Three of the ribs needed to be made left hand and three right hand. After forming the first three ribs I had to transfer the bend lines to the back side of the remaining blanks so that they could be formed in the opposite direction. I then formed all of the flanges. Next, I used my scotchbrite to clean up all of the ribs.


You must be logged in to post a comment.