
Today I drilled all of the pilot holes in the skin.
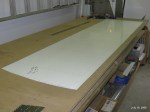
Upper Left Wing Skin Layout
Today I completed the layout of the holes in the upper left wing skin. I also trimmed the skin to size. Next time I’ll drill all of the pilot holes.
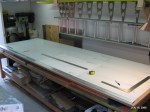
Drilling Pilot Holes in Lower Left Wing Skin
After drilling all of the pilot holes in the lower left skin I started on the upper left skin. First I identified that the plans show the inside view of the left skin. I unrolled 3 sheets and then rolled two back up. Next I determined which would be the inside. I was fortunate that the side that had some small scratches was also the side with the labeling so it was easy to decide to use this as the inside. Next I did my rough layout so that I could cut out the smaller sheet to work with. After trimming the sheet I started to layout the finished dimensions by first drawing the leading edge and the working on the outboard edge.
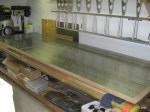
Wing Skins
I picked up some more aluminum sheet yesterday. Today I am double checking all of my dimensions on the first sheet before I start drilling pilot holes. After I checked and adjusted the layout I started to drill pilot holes.

Lower Aft Skin
Today I continued to work on laying out all of the holes in the lower aft skin for the left wing.
Cutting Out Wing Skins
I picked up the first of 6 sheets of 0.025 aluminum sheet from aircraft spruce yesterday. I’ve been waiting for it to come in so I could start on the wing skins. Today I’m going to layout one of the skins.
Completing Left Wing Initial Assembly
I finished up the assembly of the left wing. Next, I need to get going on the skins and the pitot line support brackets
Fitting Root Ribs on Left Wing
Today I worked on completing the root ribs for the left wing. I worked on the rear rib first. I measured the 9/16 inch dimension from the rear spar and then fit the rib to this line. Using several .032 shims I aligned the rib with the spars and then clamped the rib to the fittings. After drilling the pilot holes I fit the reinforcement angles and pilot drilled them. Next, I added the remain holes to the reinforcement angles and transfered the holes back to the rib. The final step was to up drill, debur and rivet. For the tip rib I calculated the distance between the ribs using the skin drawing W18 and position the tip rib using the tooling hole, and the adjacent ribs. Having the spacing at the tip of the rib was helpful. The remaining steps were basically the same as for the rear rib.
Assembling Left Wing
Today I re-assembled the left wing so that I could start work on the root ribs.
Pilot Drilling Tip Ribs
I continued to install tip ribs tonight. I finished all 12 of the tip ribs leaving only the root ribs to be installed.

You must be logged in to post a comment.