
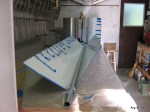
I re-assembled the left wing using clecos in preparation for fitting the wing skins.
Making Replacement Block
Today I picked up another piece of 1×1-1/4 aluminum bar and cut out a new block. I used the old block to drill the 1/4 inch holes and then after fitting I trimmed the bevel.
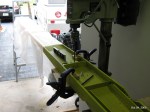
Up Drilling Wing Attach Holes to 3/8 in.
Today I am starting to work on up drilling the wing attach holes to 3/8 inches. The first thing I needed to do was dismantle the one wing that was still clecoed together. Next I setup the drill press and proceeded to drill the holes up using 9/32, 5/16, 11/32 and 3/8 inch drill bits. Unfortunately, one of my holes had the initial pilot hole off quite a bit so I will need to make one new block and redrill it.

Forming the Second Leading Edge Wing Skin
Forming Leading Edge Skin
Today I used the vacuum forming method and formed one leading edge skin.


Cleaning Up Wing Skins
Today I started cleaning up the edges of the leading edge wing skins using my sanding block and scotch bright in preparation for forming the skins. I finished the right leading edge skin and started on the left.
Drilling Pilot Holes in Right Leading Edge Wing Skin
Leading Edge Wing Skins
I finished drilling all of the holes in the left hand leading edge wing skin. Next I started the layout on the right skin. After getting the layout completed I cut out the skin to size.
Forward Left Wing Skin
I completed laying out the outline of the skin then I cut it out. Next I worked on laying out all of the holes. With the holes all laid out I need to take a break and then come back and check some of the dimensions before drilling. After checking the holes I started the drilling completing all of the holes except for at each end.
Cleanup and Forward Wing Skins
After cleaning up and rolling and putting away the previous skin I started on the left forward wing skin. The plans indicate that the right skin is shown from the outside which means that the left is shown from the inside if I use the same layout. I completed the rough layout on one sheet and made my rough cuts using my air sheers. Next, I started to layout the cut ends using the tables provided.

You must be logged in to post a comment.