Crankshaft Assembly

The title is a bit of a misnomer. I didn’t need to assemble the prop hub as I ordered the crankshaft with the prop hub installed. But I did complete the rest of the crank shaft assembly.

AeroVee Crankshaft

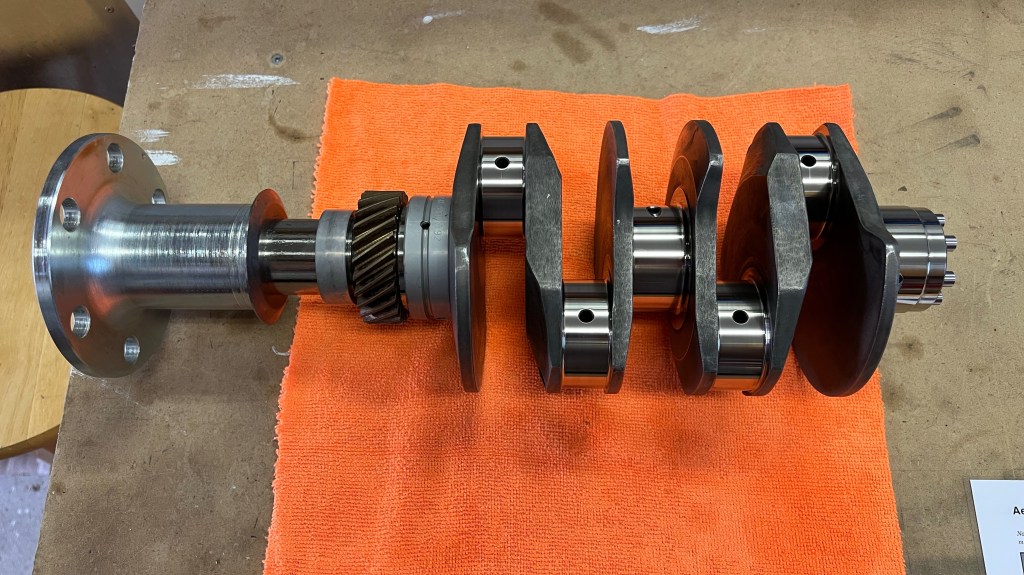
I used mineral spirits, as directed in the assembly manual, to clean the crank and I used pipe cleaners to clean the oil passages. I did not clean up the journals at the prop end as bearings had already been installed by Sonex. I was also careful not get get mineral spirits in the front oil passage that runs from the the number two cylinder connecting rod journal to the number three main journal.

I removed the hex plugs in the crankshaft at the end of the four oil passages that connect the #1, #2 and #3 main journals with the four connecting rod journals. Once all the cleaning was complete I installed the 4 hex pugs with blue locktite as directed in the assembly manual.

The final step was to torque the prop hub bolt to 80 ft-lbs. Applying the torque was a bit of a challenge, and I had to strap the crankshaft down to the bench since I did not have anyone to hold it.

Crankshaft secured for torqueing.

Painting the Cylinders

Today I painted the cylinders for my Aerovee. When I first received the engine kit I noticed that one box seemed to be a bit damaged on the corners. I took photos but upon further inspection found that the box contained my cylinders and they were fine. Since the cylinders were round the corner damage to the box did not affect the cylinders.

Cylinder Kit inside of Shipping Box
Cylinders Inside Box

After opening the box I found the retainers for the piston pins in a bag as well as some assembly instructions in addition to the cylinders and the pistons inside them.

Cylinder Box Contents

Next I proceeded to mask the cylinders with the pistons inside as shown in the AeroConversions assembly video. After getting the cylinders prepared I realized I would need different paint for these compared to the engine case. For the case, I just used a flat black enamel. The case should not exceed 400F. I had read in Bob Hoover’s blog (https://bobhooversblog.blogspot.com/2006/11/vw-case-paint.html) (https://bobhooversblog.blogspot.com/2006/11/vw-case-paint.html) that the cas should be fine painted in an oil based enamel.

Cylinders Prepared for Painting

I felt that, for the cylinders, a higher temperature paint would be more appropriate. BBQ flat black seems to be a common paint used and was recommended in the AeroConversions video. I bought a can of this for the cylinders.

Painted Cylinders

Preparing Engine Block For Paint

I continued preparing the engine block for paint today. I deburred a couple of remaining threaded holes and applied masking tape to the various surfaces that need to be kept free of paint. The Aeroconversion AeroVee assembly video helped me identify which of the various surfaces needed to be protected. For the cylinder openings in the block I used the lids from various coffee cans to close in the openings.

Front View (AeroVee) with most openings taped up.
Side view with cylinders still open.

After getting the engine fully masked I put it on a bench outside and proceeded to apply the paint. I let it dry and then a few days later removed the masking.