
Today I finished drilling all of the nut plate spacers for the nut plates with the centered threaded hole. After completing the nut plates I riveted them to the first angle for the bottom rear of the wing tip. I have one more nut plate to attach to this angle. It is a nut plate with the threaded hole at one end. I need to make up special spacers for this style nut plate.
Making Nut Plate Spacers
Today I continued to make the nut plate spacers. I made up one more strip of 5/16 inch wide by 1/16 inch thick strip and marked up the holes at 1 inch centers.
Counter Sunk Spacers
I worked at making the spacers for mounting the nut plates to the counter sunk holes in the wing tip angles.
Right Wing Tip
I up drilled all of the holes on the bottom of the wing for the wing tip angles to #30. I also removed the protective plastic coating. Next I up drilled the holes in the top of the wing for the wing tip angles to #30 and removed the protective plastic coating. I then started to dimple the holes for the countersunk screws. I completed the all of the wing skins and the two bottom angles. The top angles will need to be done with a special C-clamp I made up when making the wing tip for the other wing.
Wing Tip Angles
Wing Tip Angles
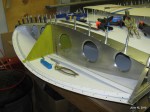
Wing Tip for Right Wing
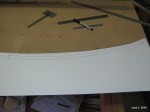
Today I started work on the right wing tip. I grabed the template I had made for the left wing and fit it to the right wing tip. It fit well, which is a good sign that both wings are the same. Next I marked the location for the angle to go at the bottom rear of the wing tip. (This is actually the top rear right now since the wing is up side down.) Next I marked out the angle with two 5/8" flanges on a piece of aluminum. I cut out the angle and started the bending process using the forming blocks I made when creating the left wing tip.


You must be logged in to post a comment.