
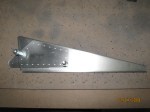
Tonight I spent a bunch of time at the CAD system to create a 3D model of the aileron tip so that I could create my own pattern for the tip rib. I created a new sheet metal model of the rib and then created the flat pattern. Tomorrow I\’ll try fabicating it and see what happens. Screen shots and a drawing to follow if it works. Stay tuned.
Aileron Skins
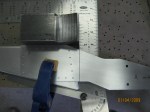
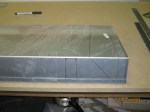
Started to cut out the Aileron Skin

Aileron Skins
I double checked my measurements then cut out the notch for the counterweight. Next I cut the end of the aileron skin. My tip ribs don\’t seem to fit right but this seems to be a common problem. I\’ll continue with the second skin then work on the tip ribs. I\’ll probably have to make new ones. I hope I don\’t have to build the whole plane twice 8^D. I completed about 90% of the layout for the second aileron skin.
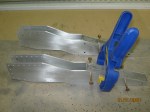
Ailerons
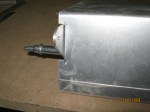
I completed all of the pilot holes (#40) in the counterbalance assemblies and moved on to the drive rib assemblies. I also drilled all of the pilot holes in these assemblies. Next, went back to work on the aileron skin and cut out the notch for the drive rib assembly. After cutting out the notch I went back to work on the counter balance assemblies. I enlarged all of the holes to #30 then I proceeded to install the small channels that I made earlier. I would like to put the rivets in the channels from the outside but I don\’t know if there will be enough room. I may try a rivet or two to see if there is enough room for the rivets. A test of the rivets didn\’t work. I guess it\’s best just to follow the plans. I disassembled one of the counterbalance assemblies and deburred one half. Next, I riveted the half together. Tonight, I finished riveting the counter balance assemblies and the drive ribs.


More Aileron Construction
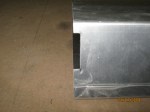
I completed finishing and forming the last two aileron ribs. Next I started to layout the aileron skins. I have to make sure to measure twice and cut once. One of the tough dimensions is the 2-19/32. I decided that that dimension should be at the start of the radius on the end of the aileron. I then sighted across the aileron to complete the curve around the edge radius.


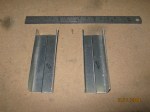
Channel and Counterbalance Assembly
Today I complete the trimming of the channels. I drilled the rivet holes in both angles to make up the channel assembly then I started on the counterbalance assemblies. I measured and drilled the first pilot holes in the aileron ribs for the counterbalance plates. Next I realized that I did not have enough ribs and have proceeded to cut out two more.
Aileron Counterbalance Assembly
I continued drilling the #30 holes through the lead weights today. Next I enlarged the holes to 3/16.
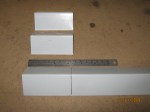
Channel Assembly
I need to make two channel assemblies, one for each counter balance assembly. I started by finding my Z02-03 angle stock. Next I cut the 4 pieces to length and started to trim them to width.

You must be logged in to post a comment.