
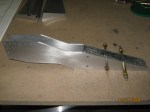
Today I started to drill the holes through the lead weights. I started with a #30 bit so that I could keep the holes lined up with the aluminum counterbalance plates. After; the #30 I moved up to the finished size of 3/16 inches. I used a pecking action and some candle wax as a lubricant and had no problems.
Second Counter Weight Assembly
I started by using the aluminum counter balance plates to drill #40 pilots for the the through holes in the counter weights. After marking all the holes I continued using a #30 drill in the drill press.


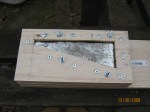
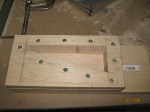
Making Molds for Aileron Counterweights
I used some hardwood to create the mold for the counterweights. The wood was only 3/4 of an inch thick so I doubled up the thickness. I screwed the two blocks together then I cut out the form using a jig saw. Next I used a third piece for the bottom of the mold. I drilled through all three pieces and bolted them together. I figured it would be easy to remove the bottom after the lead hardens and I would be able to tap the weight out.
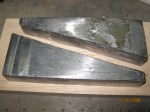
Making Aileron Counter Weights
I purchased an inexpensive pot and proceeded to melt my lead divers weights on a camp stove. It seemed to take quite a while for the melting to begin but once it started it proceeded fairly quickly. Once I had about 1/2 of one 8 lb weight melted I decided to try pouring. Pouring the lead into the mold was pretty uneventful. There seemed to be a lot of bubbling going on. I\’ll have to see what the results look like after I get the lead out of the mold. The first weight looked great out of the mold. The second one was not quite so nice. I used my plumbing torch to melt some additional lead and fill in the voids.


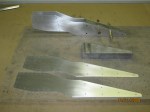
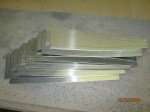
Fabricating Aileron Ribs
I started the work today by cleaning up the rib blanks I cut out earlier. I used my bench sander as well as a sanding block and files to get all of the rib blanks to the same size. (Or as close as I could get) After making all of the blanks the same size I set up my bending brake and formed all of the flanges. Three of the ribs needed to be made left hand and three right hand. After forming the first three ribs I had to transfer the bend lines to the back side of the remaining blanks so that they could be formed in the opposite direction. I then formed all of the flanges. Next, I used my scotchbrite to clean up all of the ribs.


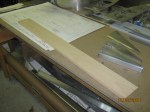
Deburring the hinges
I deburred the hinges and then wrapped up the flaps for storage until I can get them inspected. Now on to the Ailerons.
Aileron Ribs
Time to start laying out the 6 Aileron Ribs that I need. After tracing out the ribs, I cut them out with the Malco snips. Next I marked and drilled the holes for the radii at the flanges. Finally, I trimmed the ribs to size.
Deburring and Riveting Left Flap
After removing all of the clecos and labeling the inner ribs I proceeded to deburr the ribs. The outside was easy using my swivel deburring tool but the inside of the flanges was more difficult. I used some 220 grit Al oxide sandpaper on a popsicle stick to break the burrs off from the edges of the rivet holes. Next I used a scotchbrite pad so finish the ribs. With the ribs completed I proceeded to use a block of wood to hold the flap skin open to provide access to the inside. Again, I used the w220 grit Al oxide sandpaper on the popsicle stick to break the burrs off the edges of the rivet holes. With the skin deburred I reassemble the flap using clecos and started the riveting. Again, I left the flap such that it could be opened for inspection.
Left Hand Flap
I started by getting the pilot holes layed out on the hinge. Next, I drilled the pilot holes in the hinge and then transferred the holes to the flap skin. The next step was to enlarge the holes to #30. Next time I\’ll take everything apart and start deburring.
Prep and Assembly of Right Flap and Start on Left Flap
Today I started by deburring all of the edges on the flap skin. Next I pulled the rivets on two sides leaving a flap open for inspection prior to closing. After completing the right flap I started to layout the holes in the left flap. I matched the same mistake I made on the right side in order to ensure the two flaps look the same. After marking all the holes I drilled all the #40 pilot holes through the skin and then I started to install the ribs and complete the pilot holes into the ribs.

You must be logged in to post a comment.